HATCHES IN FUSELAGE FRAME BOATS
When I built Sling Shot I installed and documented the installation of the hatches. There are a lot of ways you could do this but this method is fairly simple and it provides a solid surface to mount the hatches. They are not attached to the skin only so you are not constantly stretching the skin when opening and closing.
I started by figuring out where I want the hatch on the boat. I did this by pretending the hatch was installed and I was reaching in to pull something out. My instinct was to locate the hatch centered between the bow and cockpit. I quickly discovered that I needed to locate it more to the front so I could reach ‘most’ everything in the boat.
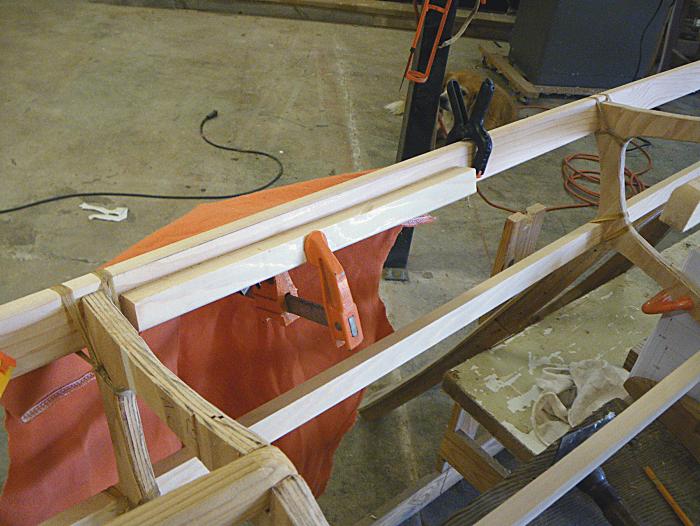
With my location picked I settled on what size of plywood I would need to mount the hatch too. Then I cut some strips from stringer stock and planed the top edge of the strips to the proper angle so the plywood would set flat on them. I temporarily clamp them in place while I am fitting everything together.
I had a used piece of 3/8″ exterior plywood siding laying around the shop so I used that. I trimmed it to fit between the frames. The lashings were in the way at the back edges so I cut the corners at an angle.
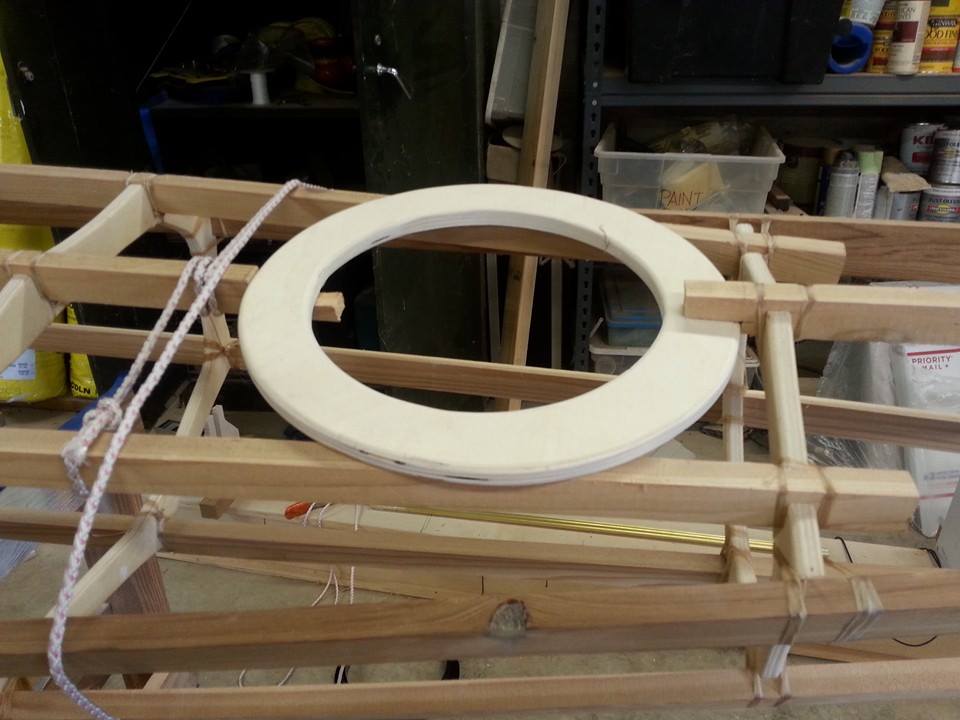
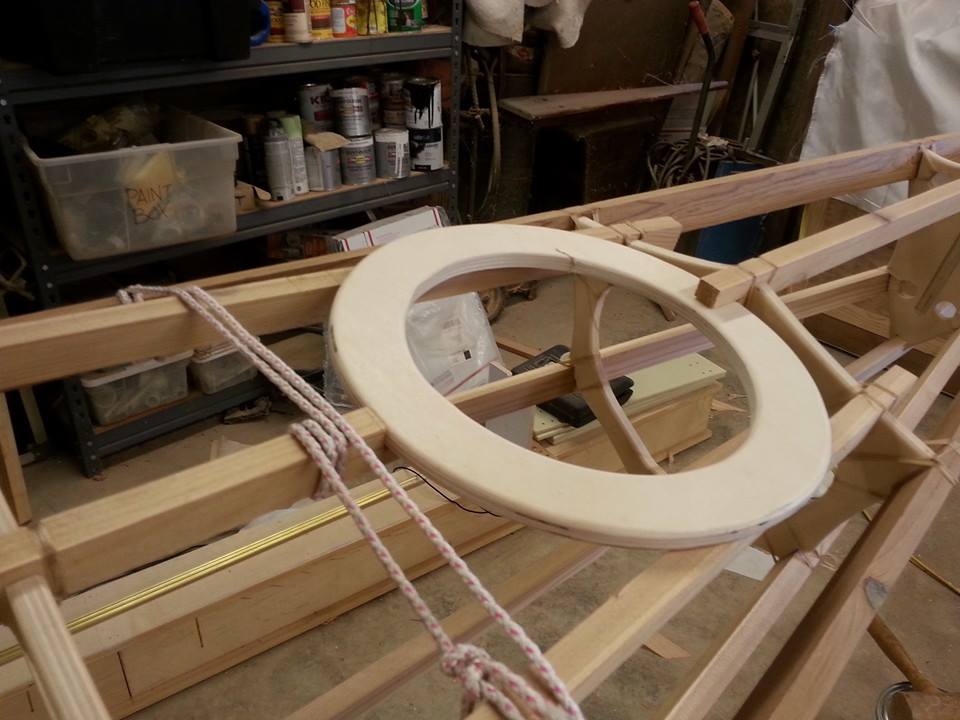
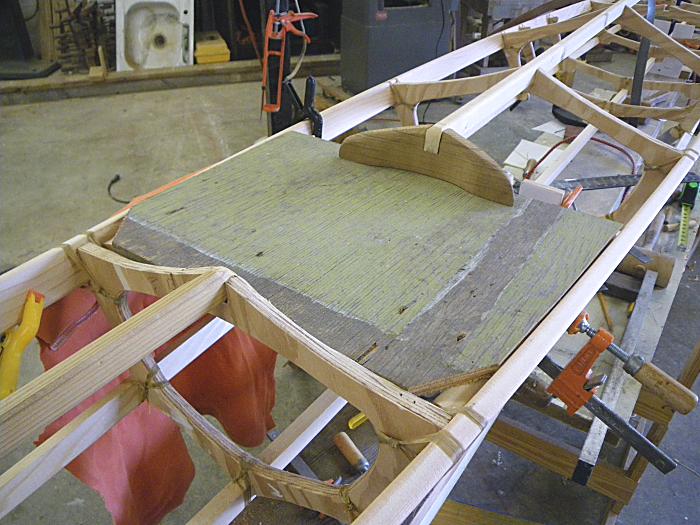
I had decided to recess the hatch because I like the look and it was easier to do on this boat. The deck stringer had to be trimmed and needed a support on the end(s). I decided to make a block and while I was at at it I wanted to wrap it around the hatch. I left the end by the frame as it was rather than adding a block to it. After seeing these two finished, on the next boat I will not go to all that trouble to make a radius cut. I will just make a straight shape because the difference in the look of the two is not that different and sure not worth the effort.
Working on this I found that I needed to add a strip underneath the rear of the plywood where it butts against the frame or it flexed to much. I glued a strip of stringer stock underneath and that stiffened it up quite nicely. The block on the front, once glued in place stiffened the front edge enough so that nothing else was needed.

While fitting all this together I would stretch a piece of t-shirt cotton over it to see how it would look once skinned. This would show me anywhere that needed a little more work done to it.
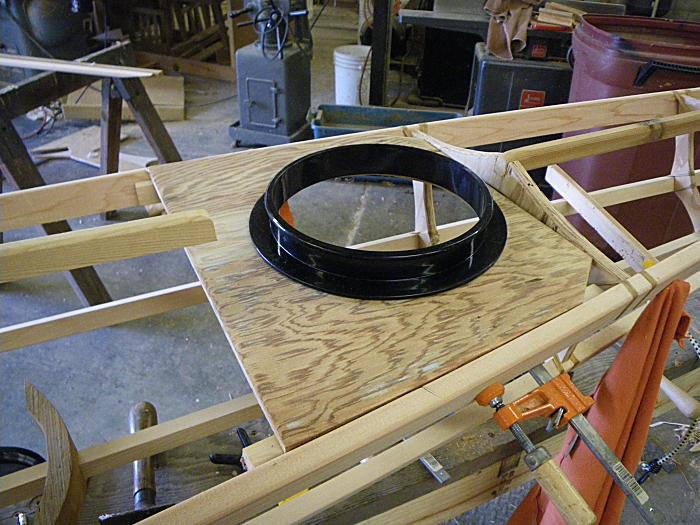
I cut out the hole for the hatch ring and made sure everything was like I wanted it and then I glued the rails to the inside of the Gunwales. Then I glued the plywood in place and the block that supports the deck stringer. I couldn’t lash the end of the stringer so I just applied to a little glue to hold it in place. Once the skin is on it couldn’t move anyway.
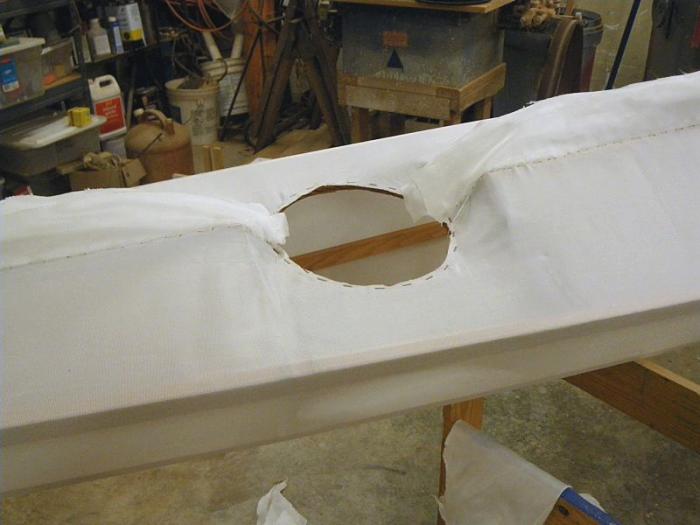
When you skin the boat the simplest way to finish it off it staple the skin to the plywood. I used monel staples because they don’t rust. I trimmed the fabric around the opening after sewing on the skin. I placed the hatch in place as I sewed to make sure where to end my stitching so it didn’t interfere with the fit of the hatch.
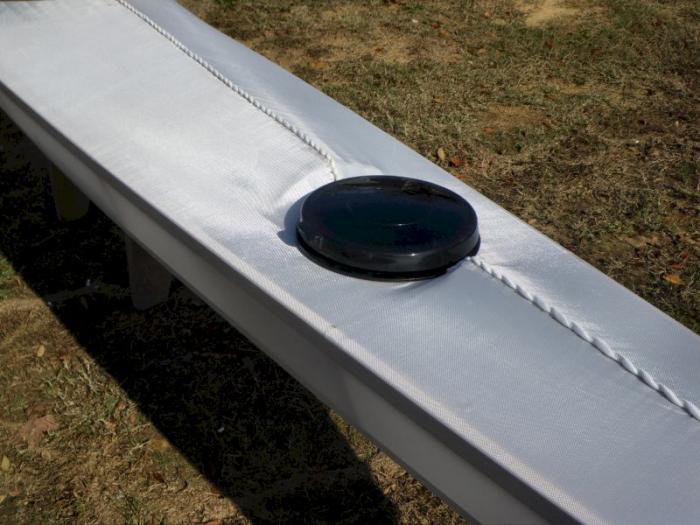
I applied the finish to the skin before permanently installing the hatches. That way I knew my skin was waterproof and it kept me from having to mask off the hatches to keep the paint off them.
When I installed the hatch for the last time I put a bead of caulking under the ring to make sure it didn’t leak. Because the plywood is thin I cut a 1″ wide ring from 1/2″ plywood and placed it inside the boat under the hatch ring. I lightly clamped it and the hatch in place and then drove my screws into the two layers of plywood with stainless steel wood screws. I made sure that the screws were not so long that the pointed ends stuck out of the plywood into the boat.
I want to give credit where credit is due! I got this idea from ‘wysedav’ over on the Blue Heron kayak forum. He came up with the idea and I just borrowed it. It turned out very well and it is relatively simple to do. Plus I love the way it looks!

EDIT
Recently I have been changing the deck shapes on my designs and I tried a new way to install the hatch on the bow. It is pretty straight forward method, I cut a plywood ring that would set on the outer deck stingers. I think you can see what I did in the photos. Keep in mind these were taken during the fitting and all sharp edges were rounded over.